Home » 2023
Yearly Archives: 2023
Why You Need a Plumber to Repair Your Plumbing
Plumbing systems remove waste, supply hot and cold water, and regulate indoor climate through pipes, fixtures, and appliances. When these systems experience issues, homeowners need Plumbers Bradenton to repair them.
Plumbers use critical thinking and analytical skills to identify problems, weigh solutions, and make repairs. They also need physical strength and stamina to lift heavy equipment and tools.

Clogged drains are one of the most common plumbing mishaps homeowners face. They happen when soap residue, hair, food scraps, and more make their way into your home’s drain lines and obstruct the water flow. While minor clogs may be easily cleared away with a plunger or drain snake, repeated clogs could indicate a larger problem that requires professional help.
Backed-up wastewater in toilets, sinks and bathtubs is a clear sign of a clogged drain or sewer line. You may also notice a foul-smelling smell coming from the affected fixture, or hear gurgling noises when water is attempting to pass through.
Since your toilets, sinks and tubs are interconnected and all flow into the same main drain line, a clog in one will affect the others, causing wastewater to back up into your home. This is not only an unsanitary and unpleasant situation, but it can lead to further damage to your plumbing system and possibly even your property.
Most clogs occur in the toilet trap or the drains underneath your bathroom fixtures, as these are the most likely to be blocked with things like soap scum and hair. If you suspect a clog, try pouring hot water down the drain followed by a mixture of baking soda and vinegar. If the clog persists, call a plumber in
The drain lines that carry waste, wastewater and rainwater throughout your home are usually out of sight and mind until they start to give you problems. Pipes that transport these materials can clog for a variety of reasons, including old age, root intrusion, faulty joints and a buildup of fats, grease and other debris.
When these pipes become fully or partially obstructed, it can cause reactions ranging from slow drainage to severe flooding and structural damage. A clogged drain line can also attract household pests, such as drain flies, so it’s important to address this issue as soon as you notice it.
While most clogs are caused by items that you flush down the drain, there are a few things you can do to prevent them in the future. You should always be careful about what you put down the drains, and consider installing protective covers over your drain openings to deter children from putting toys or other objects into them.
The plumbing system in your home is constantly working to handle fluctuating water pressure, temperature extremes and daily use. All of this can cause wear and tear on your pipes over time, resulting in leaks. This is why it’s important to have your pipes routinely inspected by a plumber. They can make sure all of your pipes are in good condition and if any repairs are needed they can be completed before the problem gets out of hand.
Leaky pipes can lead to a lot of damage in your home, from flooding and water stains to mold growth and costly water bills. If you notice a water leak, it’s important to turn off your water supply and call a plumber right away. They can help you dry up any puddles and determine the source of the leak. Then, they can repair or replace the damaged section of pipe and restore your water service.
Many different things can cause leaking pipes, from age and rust to broken joints or corroded pipes. If you have old galvanized pipes in your home, they may need to be replaced with new copper or PVC piping. Newer homes usually have insulated or plastic piping which is less prone to leaks. No matter what kind of pipes you have, they will need regular maintenance and inspections to ensure they are in good shape.
If you aren’t sure what the source of a leak is, there are some quick and easy DIY ways to fix it. For example, if the leak is caused by a broken joint, you can try to tighten it with plumber’s tape. This will create a temporary seal until you can have a professional plumber look at it. You can also use a rubber hose piece that’s cut to be slightly longer than the leak and wrapped around it. Then, you can use a hose clamp to secure it in place and prevent the leak from spreading.
Other causes of leaking pipes include poor workmanship and shoddy construction. If the previous homeowners hired an unlicensed contractor or did a DIY job, this can cause major problems with your plumbing later on. A licensed plumber will take care to do a quality job and minimize the damage to your home when they work on your plumbing system.
If you’re having trouble with water pressure throughout your home, the first thing you should do is check to make sure that all of the shut off valves are completely open. There’s usually one on the street side of the water meter and another on your own side, as well as separate ones for each fixture in your house. Make sure that these are all wide open, and if they’re not, then that’s the source of your low water pressure.
It’s also possible that your home’s pipes are simply too small to handle the volume of water you’re trying to use. This is a common problem in older homes that used galvanized steel pipes, which are now prone to corroding and restricting water flow. In this case, the solution is to have your plumber install newer, more durable pipes that will be able to handle your household’s water usage.
You might also find that your water pressure is low because there’s a leak in your pipes or the water line. This is a more serious issue that requires professional plumbing assistance, as your leaky pipes will eventually cause water damage to your home.
Sometimes, the problem is on a much larger scale than just your home’s pipes. If you’re experiencing low water pressure across your entire neighborhood, then that’s likely because of a problem with your municipality’s water supply. While you can’t do anything about this issue other than to wait for it to resolve itself, you can talk to your neighbors to see if they’re having the same problems.
Fortunately, most of the problems that can cause low water pressure are easily repaired by a professional plumber. However, there are some issues that are impossible for homeowners to tackle on their own. In these cases, it’s always best to call in a plumber to avoid further damage and costly repairs down the road. When it comes to your home’s plumbing, never take chances – leave the hard work to the professionals! Contact a local plumbing company today to get started. The sooner you do, the faster your home will be back to normal with great water pressure!
The quality of your water affects both your health and the integrity of your plumbing system. Poor water quality can lead to illness and damage your plumbing, causing leaks and pipe failure. Taking steps to safeguard your water quality and recognize the signs of poor water quality can help you avoid costly repairs and protect your home investment.
There are a variety of factors that contribute to poor water quality, including chemical and biological contamination, sewage pollution, and thermal pollution. These factors occur both naturally and due to human activity. Chemical and biological contamination can be caused by agricultural waste, industrial waste, pesticides, and animal carcasses, all of which can enter the water supply. These contaminants can cause gastrointestinal issues, skin irritation, and even long-term health problems if ingested on a regular basis. Sewage pollution can be caused by both residential and commercial sewer systems, as well as oil spills. This type of pollution can create a breeding ground for bacteria and other pathogens in bodies of water.
A common sign of poor water quality is brown or discolored water. This is caused by iron and manganese in the water, sediment buildup in pipes, or sewage contamination. If you notice an unusual color or odor in your water, it’s important to have it tested by a plumber for proper diagnosis and treatment.
Water filtration systems can be used to reduce or eliminate these contaminants. Additionally, a plumber can install water softeners to help eliminate hard water, which is often a result of mineral buildup in pipes. Repiping your home can improve water quality by replacing old, corroded pipes with new, durable pipes made of copper or PEX. These new pipes will ensure clean, fresh water throughout your home without the risk of clogged drains or poor water pressure.
Another way to ensure the quality of your water is to minimize water waste. Plumbing repairs and the use of efficient appliances and fixtures can reduce water waste and save money on your utility bills. This is also beneficial for the environment, as it reduces strain on local water resources.
Spray Foam Insulation Is a Powerful and Versatile Product
Spray Foam Insulation Houston is a powerful and versatile product. It provides a high R-value and acts as an effective vapor barrier.

It also helps with air quality. The airtight seal it creates makes it impossible for dust, pollen, and other contaminants to enter the home.
New foams use HFO-blowing agents that have a lower GWP rating than petroleum-based products. Some are even made from soybeans!
Spray foam insulation is a powerful insulator that creates an air seal. A home can lose 30 percent of its energy due to leaks in the insulating envelope, so a tight seal is critical. Spray foam is a cost-effective solution for blocking drafts, improving energy efficiency and lowering utility bills.
This insulation is an excellent choice for homes with crawl spaces, rim joists, attic access doors and other penetration points where air from the outside can invade. It can also seal around ductwork, electrical wires and plumbing stacks. Sealing these penetration points prevents air movement through these small cracks and crevices, which allows outdoor pollution, odors and dust to invade a home. This type of insulated sealing is also beneficial in buildings with existing walls, as it blocks air movement that can cause wood framing to shrink and crack.
Some spray foam insulation contains isocyanates, which can be toxic if the chemical mixture isn’t right or the product doesn’t cure properly. Isocyanates are powerful irritants for the eyes, gastrointestinal and respiratory tracts. They can also trigger asthma attacks in those who are sensitive to them. An overdose of isocyanates can even lead to a type of lung disease called chemical bronchitis.
However, new generation spray foam insulation uses much less isocyanates and has a shorter curing time. It still does have some off-gassing and odors, but the amounts vary by brand and type. If a homeowner is concerned about these potential effects, they should ask installers to use a low-VOC and odorless spray foam.
If a homeowner decides to go with spray foam insulation for their project, they should work with certified professionals. This is important to protect their health and the quality of the job. A qualified contractor will know the difference between open- and closed-cell spray foam and how to choose the right type of insulation for a particular project. They will also understand how to install the product correctly to ensure that it provides the benefits homeowners are expecting. Some homeowners may even qualify for a rebate or tax credit to offset the cost of the project.
It Stops Moisture
Moisture is one of the most common problems that homeowners face and it can lead to rotting wood, mold and mildew. When left unchecked, moisture damage can be very expensive and even lead to structural damage or a complete loss of the home or building. Spray foam insulation stops moisture in its tracks. The ability of spray foam to seal air leaks and keep moisture out is a major factor in its ability to prevent rot, mold and mildew.
The fact that spray foam can be sprayed to fill the exact spaces where it’s needed means that there is a very good chance that it will create an effective barrier against moisture. This is because it isn’t porous like other forms of insulation and does not wick water. It is also not absorbent, allowing any excess moisture to evaporate quickly.
Many types of insulation become damp over time, which can lead to rot or mold. If this occurs, they may need to be replaced. However, spray foam insulation will not get damp, which makes it a more long-term solution. Spray foam insulation will protect a structure and its contents for far longer than other forms of insulation.
Foam insulation is non-toxic and safe to be used in areas where electrical wiring systems or pipework are located. However, while it is curing, it will off-gas amines and isocyanates. This is why it is important to use protective gear when applying the spray and to have a qualified professional do it.
Open cell spray foam does not off-gas these chemicals and is a safer option for homes that are already insulated. However, closed-cell polyurethane spray foam does still off-gas these gases. However, it is possible to find eco-friendly brands of spray foam that are free from these chemicals and do not release them into the atmosphere.
While both types of spray foam are effective at stopping energy losses, open-cell is more breathable and therefore better for homes with moisture issues. Closed-cell is less breathable, and therefore more suitable for newer or older homes. If you’re considering insulating your home with either type of spray foam, talk to your local insulation installers about which is the best fit for your home.
It Reduces Energy Usage
Many homeowners find that they save between 30 and 50 percent on their energy bills when they invest in spray foam insulation. The reason for this is that spray foam helps to reduce energy usage by creating a custom airtight seal around the entire building envelope. This eliminates the air infiltration that is so common and causes high energy costs.
Air infiltration is a big problem in homes and can cause energy bills to go through the roof because air leaks force your furnace and AC unit to run constantly in order to keep up with the demand for heat and cool air. The second law of thermodynamics states that hot air is always trying to move into a cooler space. Spray foam insulation creates a custom airtight seal, which stops the flow of hot air into the home during the summer and cold air out during the winter.
In addition to reducing energy usage and improving comfort levels, spray foam also helps to prevent moisture problems inside the home. This is because it fills the small gaps and crevices where moisture can seep through, and it prevents places like attics and crawl spaces from becoming damp and humid environments that require dehumidifiers to work hard in order to remove the excess moisture.
It’s important to note that homeowners who install spray foam insulation may be eligible for rebate programs or tax credits. Check with your local building authority to see what options are available in your area. This is an excellent way to reduce the cost of this upgrade, and it could help you to pay for part or all of the installation cost.
Spray foam insulation is also a good investment because it lasts for a long time and won’t need to be replaced like fiberglass or cellulose. These other types of insulation break down, sag and settle over time and will need to be replaced at some point. Foam insulation, on the other hand, will never need to be replaced.
This makes spray foam one of the best investments you can make when it comes to reducing your energy usage and saving money on your monthly utility bills. If you are considering making this type of efficiency upgrade to your home, contact us for a consultation on open- and closed-cell spray foam insulation.
It’s Easy to Install
Spray foam insulation is easy to install in existing homes, new construction and pole barns. It is sprayed directly into gaps and holes in walls, attics and crawl spaces. It can be used on its own or in conjunction with other types of insulation like fiberglass batts. Unlike other types of insulation, spray foam is injected into the space with a hose from inside a specialized truck or trailer. This rig contains a computer that ensures the proper ratio of chemicals is mixed. The nozzle is also heated so the foam is always at the correct temperature.
It is highly advisable to hire a professional to work with spray foam insulation. It’s not something that can be done on a weekend and the chemicals require special safety equipment such as face masks, goggles and full protective suits. The blowing agent that gives spray foam its insulating properties has a high global warming potential. In addition, if the DIY kits you can purchase from big box stores are installed incorrectly, the materials could create health and safety issues for the homeowner.
The air sealing properties of spray foam mean that it prevents heat from escaping your home during the summer and keeps cold air in during the winter. This can lead to a decrease in your energy usage which will ultimately save you money on your monthly bills.
Spray foam insulation also stops moisture from getting into places like attics and crawl spaces. Moisture can damage structures and lead to mildew or mold. Spray foam prevents moisture from entering the structure because it expands to fill the gap and then seals. This can also help to prevent the need for a dehumidifier in your home.
Although spray foam can be used in many places, it’s ideal for attics and crawl spaces. It’s also great for rim joists and knee walls in existing homes, under roof decks, and in new construction. It’s even effective in voids and around plumbing or electrical wires.
Safety Rules For Asbestos Shed Removal
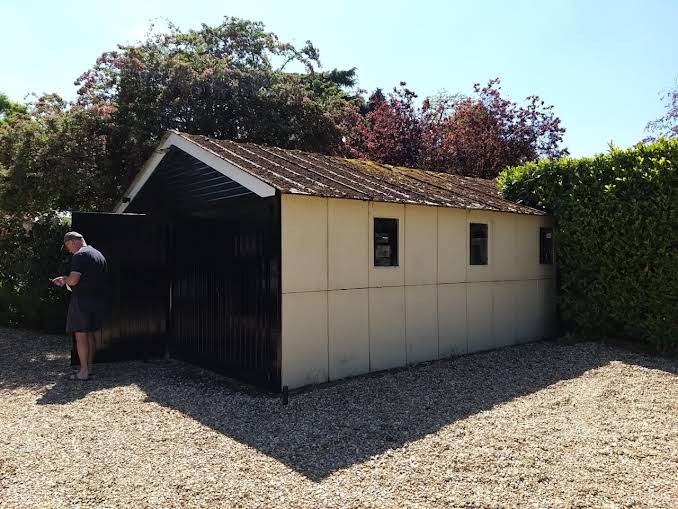
A licensed asbestos assessor should be consulted to determine the presence of asbestos and the best method for its removal. A contractor should be employed to carry out this work.
Be sure to avoid sanding or drilling, as this may release fibres. It is also a good idea to wet the material before sampling it. Visit Website to learn more.
When performing asbestos shed removal, it is important to remember the basic safety rules to avoid any accidents. First, you should make sure that the work area is clear and free of any other materials that could contaminate the environment during the process. Secondly, all equipment and tools that may come into contact with asbestos should be wetted prior to use. Wetted material does not float in the air as easily, and this will help to prevent the spread of asbestos fibers during the project.
In addition, all asbestos waste must be double bagged and clearly labeled as hazardous. Once the project is complete, all equipment and clothing must be removed from the work area and immediately placed into sealed bags for disposal. The work area should also be cleaned and wetted thoroughly, and a special HEPA vacuum cleaner must be used rather than a regular one. Lastly, a decontamination area should be established with a shower that all contractors and workers can use to remove dust and debris from their clothes and shoes before leaving the work site at the end of each day.
It is recommended that the survey, identification and demolition work of the asbestos be carried out by a licensed contractor. This will ensure that the process is done correctly and that no asbestos fibers are released into the air during the project. A competent contractor will have up to date asbestos awareness training and should be able to provide the relevant certificates.
If you decide to do the work yourself, you should be aware that it is only safe to perform self-removal on single-family dwellings (e.g. houses, mobile homes, houseboats, detached garages and mother-in-law or guest cottages). It is not a good idea to carry out this work on commercial, industrial and multi-family buildings or structures.
It is also recommended that you do not drill or saw asbestos paneling, roofing sheets or pipe insulation as this can release fine dust and fibres into the air that can be breathed in. It is generally considered that this type of material only becomes dangerous if it is disturbed, and this is why it is best to leave it alone and to have any maintenance or major repair work carried out by qualified and licensed professionals.
Preparation
Firstly, it is important to make sure that you are working in an area that is isolated from the rest of your house and that any vents are covered. It is also a good idea to close off doors and seal areas that could be contaminated. This can be done with plastic sheeting and duct tape. It is also a good idea to turn off air conditioning and fans as asbestos dust can travel through these.
It is recommended that you wear a disposable fibre mask for this type of work. You can buy these from most DIY stores and online. You will also need a pair of rubber gloves and some heavy-duty plastic bags. You will also need a water sprayer or tank spray bottle for wetting down the shed and any asbestos-containing materials that need to be removed. It is advised that you only do this type of work when the weather is dry as asbestos cement can become very dangerous if it is wet.
Once you are ready to begin, the first thing you should do is lay down a strip of heavy-duty plastic across the area where you will be working. This will create an area for you to work in and will prevent any asbestos fibres from travelling from your shed to other parts of your home, especially through the ventilation system. You should then put on your protective clothing, ensuring that it is well fitted and is made from a material that you can throw away afterwards, such as paper overalls. You should also wear a disposable fibre mask that fits properly over your nose and mouth to ensure that no asbestos particles get into your throat or nose.
You should then start to remove the asbestos panels or roofing sheets, taking care not to damage them. You should not use power tools as this will release tiny fibres into the air that can be inhaled. If you do have to use a power tool, then it should be used as a last resort.
When you are finished, double bag all the asbestos debris and place it in a safe place for disposal. Hose down the work area to make sure that no small pieces of debris remain and wash your clothes thoroughly when you are finished. You should also make sure that your hair is tied back and that you have washed your hands and fingers.
Removal
Before asbestos was banned in 1999, it was a popular addition to construction materials for its ability to strengthen building materials, resist the elements, insulate and fireproof. Therefore, structures like garages and sheds built before the ban are likely to contain asbestos-containing materials (ACMs). Asbestos in good condition doesn’t pose any immediate risk but if ACMs become damaged or deteriorate it can release harmful airborne fibres that can be inhaled and permanently adhere to the lungs. This can lead to a range of serious health conditions from 10-40 years later, including several forms of cancer.
The only way to know for sure whether a material contains asbestos is to have it tested by a professional. But if you haven’t had your shed tested and suspect it may contain asbestos, there are some basic steps that can be taken to minimize the risks to your family’s health.
Firstly, never paint, drill or saw ACMs as this can disturb them and cause dangerous particles to be released into the air. Asbestos cement is usually hard-wearing and will last for a very long time, but it can be dangerous if it is disturbed.
Asbestos is only a health risk when it is airborne, so the most important thing to do is make sure that your work area is well-ventilated. A filtered vacuum cleaner with HEPA filters is recommended, but it’s essential that all family members, friends, neighbours and anyone else who is in the vicinity of your workspace wear protective clothing and use a respirator if necessary.
Asbestos removal should only be undertaken by trained professionals who are experienced in working with asbestos. They will bring durable, airtight waste disposal bags to remove concentrated asbestos from your home and dispose of it at a certified landfill. Waste management services also offer recycling options for some types of asbestos, turning it into non-toxic ceramic fibres. Ask your waste management service about the options available for your specific materials. In many cases, recycling can be cheaper and more environmentally responsible than disposing of it in a landfill.
Disposal
Asbestos can only cause harm if it is disturbed, which releases the dangerous fibres into the air that people breathe in. Luckily, as long as the asbestos remains intact and undamaged it is very safe and can be left in place to serve its purpose. However, if the structure is in poor condition, it will need to be removed and disposed of correctly.
Before starting any work, a qualified and licensed asbestos assessor should inspect the area to check for any asbestos materials that require removal or disposal. Licensed inspectors are highly trained and will be able to advise you on what needs to be done and what safety measures should be taken. They will also provide you with a written report. It is essential that all safety precautions are taken during the removal process, and that the area is kept as clean as possible to prevent the spread of any potentially hazardous particles.
Dampening down the surface of the shed before and during the removal is extremely important, as it will drastically reduce the chance of any asbestos fibres becoming airborne. It is also advisable to cover any surfaces that don’t require removing with plastic sheeting, and to use negative air pressure during the entire process. It is also a good idea to notify neighbours of the work that will be taking place, and to keep children and pets away from the area.
Once the asbestos has been removed, it should be wet down and wrapped in heavy duty polythene, and sealed in two layers. It is also a good idea to double bag it, and to make sure that the bags are clearly labelled with the words “Danger – Contains Asbestos” and “Cancer and Lung Disease Hazard”. The waste must then be transported to an approved landfill site and buried in a sealed container.
Most large towns have facilities that can accept this type of waste, so if you are a house owner then it is likely that you can take the waste yourself in your own vehicle provided it is your own waste. Some towns have regulations on the maximum amount of asbestos that can be taken to these sites, and a permit may also be required.
The Importance of Used Cooking Oil Collection

Used cooking oil (UCO) should be disposed of properly. Pouring it down the drain can clog your kitchen’s pipes and create health hazards. It can also promote unwanted pathogens. UCO can be recycled to give it a renewed purpose.
Cooking oil can be transformed into biodiesel, a renewable fuel that reduces the nation’s dependence on foreign oils. But first, you must let the grease cool. Visit Website for more information.
Waste removal
When used cooking oil (UCO) is disposed of improperly, it can cause a host of problems. It can clog pipes and endanger plants and animals, but it also has the potential to pollute water systems. UCO recycling helps keep this waste from harming natural resources, and it can even be turned into alternative fuel.
There are many ways to recycle cooking oil, including at your home. For example, you can buy a home grease collector to reduce the amount of waste your household generates. This is an excellent way to save money and protect the environment. You can also recycle your cooking oil at a restaurant or in a community drop-off location.
In some areas, the waste management system includes a special receptacle for UCO at the local dump or landfill. In other places, restaurants have dedicated receptacles for their grease. These receptacles are usually large enough to hold up to five gallons of cooking oil. This way, the waste can be removed quickly and easily.
The process of collecting and processing UCO is highly regulated. In most cases, companies must have a permit to collect and transport this waste. They also need to store and dispose of it in a secure location. In addition, they must have a proper waste disposal plan for used oil and grease.
Ideally, the used cooking oil should be poured into a plastic or metal container that is labeled with the type of oil it contains. This information will help the recycling facility determine the best method for processing it. It is important to note that it should not be mixed with other liquids or products. Also, the oil should not be stored for more than three days.
Once the used oil is collected, it is placed into a storage area known as a satellite accumulation area (SAA). This is a temporary storage location for chemical wastes until they can be moved to the main accumulation area for offsite shipment. The SAA should be located near the point of generation, and it must be emptied as soon as it is full.
Environment protection
Cooking oil recycling is important for the environment. When disposed of properly, it can be recycled into biodiesel fuel that can help reduce the use of traditional fossil fuels. This helps to protect the environment and ensures that waste cooking oils do not get into the water supply and harm wildlife. It is also good for the local economy, as it creates jobs in the processing and transportation of waste cooking oils.
Whether you own a restaurant or are a homeowner, it is important to know how to dispose of your cooking oil. While it may seem harmless to pour grease down the drain, it can clog pipes and cause major damage to kitchen appliances. Additionally, it can go against regulatory guidelines, putting you or your business at risk of fines.
Environment protection refers to the preservation of natural resources and natural environments by individuals, organizations and governments. It involves the creation of laws and regulations that limit human activity to prevent pollution and environmental degradation. It also includes the conservation of biodiversity, including plants and animals, and the rehabilitation of degraded habitats.
Many environmental protection initiatives have been inspired by works of literature, such as the Sand County Almanac by Aldo Leopold and The Tragedy of the Commons by Margaret Mead. These pieces highlight the need for human action to address the environmental issues of our time. They advocate for the establishment of an environment ministry to monitor and oversee the impact of development on nature and humankind.
Environmental protection has grown into a global issue that affects all aspects of life. With advances in technology and the demands of modern living, there is an ever-increasing threat to the quality of the environment. Fortunately, there are many ways to improve our environmental conditions, including through recycling used cooking oil. However, it is crucial to find a responsible waste management company to avoid potential legal problems and ensure that your used cooking oil is recycled in accordance with federal guidelines. It is also important to choose a company that follows local regulations and is licensed by the state.
Health hazards
Cooking oil is an essential ingredient in many restaurants, but it can also be a health hazard if not disposed of properly. If you pour used cooking oil down the drain or flush it down a toilet, it can clog pipes and harm septic systems. Moreover, it can attract rodents and generate a foul smell in your kitchen. Instead, you should keep it in a sealed container and throw it away in the trash or bring it to a recycling center that accepts food waste.
Some restaurants dispose of their used cooking oil by mixing it with materials such as sand, flour, sawdust, or pet litter and then packing the mixture into a large plastic bin or a metal can. These containers can be stacked on top of one another and stored in an outside area, which helps protect them from pests and the weather. However, this method is not environmentally friendly and can pose a health risk to employees.
The problem with reusing cooking oil is that it creates acidity in the body, which can cause cancer and other serious illnesses. In addition, it releases a carcinogenic chemical that increases inflammation and cholesterol levels. These risks are not only a threat to diners’ health, but they can also affect the reputation of your restaurant.
It is important to know that if you store used cooking oil before it hardens, you can still recycle it. However, you should only store it in a tightly sealed container and put it in the trash when it becomes full. You should also make sure that the container is labeled so that it doesn’t get mixed up with other materials in the trash.
The best way to dispose of cooking oil is by using a service that recycles it for fuel. These services can be found online, and they provide a free service to recycle used cooking oil for you. They also provide a monthly report of the amount of cooking oil they have collected. This information is helpful to restaurants because it allows them to plan for the future and manage their expenses.
Economic benefits
Used cooking oil (UCO) is a valuable resource that can be recycled and transformed into renewable energy. This process supports the circular economy, which focuses on minimizing waste and reusing resources. Additionally, it helps to reduce greenhouse gas emissions.
UCO can be converted into clean fuel for vehicles, machinery, and buildings. It can also be used as an alternative to diesel fuel. Moreover, it can be processed into biodiesel, which is a cleaner and more sustainable alternative to fossil fuels. Additionally, converting UCO into renewable fuel helps to support the local economy. A study found that for every 100$ spent with local companies, 68$ was kept within the community.
Many restaurants rely on used cooking oil recycling companies for collection and disposal services. This not only helps them reduce their environmental impact, but also enables them to save money on costs associated with clogged drains. In addition, it enables them to comply with local regulations regarding food-service waste management.
When used cooking oil is washed down drains, it contaminates waterways and can damage pipes. When restaurants recycle their used cooking oil, they can prevent this contamination and improve the quality of water.
Besides saving kitchens money on plumbing repairs, UCO recycling is a great way to support the local economy. Companies that specialize in used cooking oil recycling help stimulate the economy by creating jobs for drivers, collectors, and others in the industry. This is particularly important for rural communities, where unemployment is high.
Restaurants that partner with used cooking oil recycling companies can benefit from lower expenses, reduced fines for noncompliance, and better customer relationships. In addition, they can increase their brand image by promoting sustainability.
Cooking oil and grease are common byproducts of households, restaurants, and the food industry. Instead of dumping them down the sink, which can cause major structural damage to the pipes and sewer system, they can be collected for reuse.
Unlike other waste materials, used cooking oil can be safely collected and reused. Its fatty acid content and other properties make it an ideal material for fuel production. When UCO is processed, it can be turned into renewable biodiesel and used to power cars and airplanes.
Why Insulation Removal Is Necessary

Insulation Removal is a necessary step before installing new, energy efficient insulation in your home. Old insulation often contains harmful contaminants like mold, rodent excrement and urine which can cause respiratory and other health issues.
To remove old insulation, you will need a HEPA filtered shop vacuum, rakes and dustpans. Set up the vacuum hose through your attic access and clear a path to the attic. Go to https://perthinsulationremover.com.au/ for more information.
1. Increased Energy Efficiency
Insulation is crucial for a comfortable home, but over time it can become damaged or lose its effectiveness. Getting rid of old insulation and replacing it with new high-performance cellulose can improve your home’s energy efficiency by reducing heat loss, which in turn will reduce your utility bills.
Old insulation can also become a home for allergens like dust and mold spores, which can affect your family’s health by causing itchy eyes and noses, coughing, and other respiratory issues. Removing and replacing old insulation can improve your home’s air quality by eliminating these allergens and providing a clean, healthy environment for you and your family.
When insulation becomes wet, it can easily develop mold growth. This can cause a musty odor throughout the house, as well as health-related problems when the mold spores are inhaled. Replacing wet insulation with fresh, dry insulation can prevent this from happening, as the materials will no longer provide a conducive environment for mold growth.
Other reasons for removing and replacing old insulation include damage from rodent infestations, which can leave behind urine and feces, as well as from insect infestations, such as wasps and bees. These pests are attracted to the warm and dry areas of attic spaces, where they often build nests. These nests can be difficult to destroy, releasing pheromones and other scents that affect your home’s air quality.
Lastly, if you are planning a renovation project for your home, it is important to remove and replace your old insulation before starting construction. This will ensure a clean canvas for the renovation work, and allow the new insulation to be properly installed to achieve maximum energy efficiency.
2. Increased Home Value
Insulation is a significant part of a home’s overall value and should not be ignored. A new insulation system will make your house more appealing to potential buyers and could even help you get a higher price in the future if you decide to sell your property.
Old insulation can be a hotbed for contaminants and rodents posing health hazards and reducing the air quality inside your house. In addition, the contaminated insulation may contain asbestos, which must be disposed of by a professional if present. The best way to improve your home’s resale value is by removing the old insulation, properly disposing of it and replacing it with fresh material.
Many homeowners choose to remove and replace their attic insulation themselves, but it is important to hire a professional. This is because the process can be quite dangerous if there is any contamination or infestation. In addition to ensuring that the insulation is safely removed, an experienced team will also ensure that all pests and contaminants are eliminated from the attic space and that it is sanitized and deodorized before new insulation is added.
The most common reason for insulation removal is contamination from animal feces and urine. Raccoons, squirrels and bats often find their way into the attic, which can lead to the contamination of your existing insulation. This contamination can spread throughout your home’s living spaces and cause respiratory issues for everyone in the household.
Other reasons for insulation removal include damage from water leaks, which can dampen your existing insulation and halt its effectiveness. Moisture can also lead to mold and mildew growth, which is not only a health hazard but can affect the ductwork of your heating and cooling systems, leading to poor indoor air quality.
3. Better Indoor Air Quality
Old insulation often contains contaminants that can affect your family’s health. If the material has gotten wet from water damage or rodent urine, for example, it can mold. If the mold spores become airborne and inhaled, it may cause respiratory distress. This can also lead to unpleasant odors in the home, which can make it difficult to enjoy your living space.
Removing the insulation and replacing it with a modern insulation solution will enhance indoor air quality, making your living space more comfortable. New insulation will eliminate drafts, help regulate temperatures, and reduce hot or cold spots, creating a more consistent environment throughout the home.
In addition to reducing energy costs and increasing comfort, installing new insulation can contribute to sustainable living practices. The old insulation can be recycled and reused, or it can be disposed of properly, allowing you to avoid contributing to landfills and waste streams.
Many older homes have insufficient or outdated insulation, which can cause several issues for your home. Insufficient insulation can lead to higher energy bills, while aging insulation can contribute to poor indoor air quality and increase the risk of pest infestations. Damaged or unhealthy insulation can also be a fire hazard. In some cases, it may even contain toxic materials like formaldehyde or carcinogenic asbestos, which can be a serious threat to your family’s health. When the old insulation is removed and replaced with a newer, more effective solution, your home will benefit from improved indoor air quality, lower energy costs, and reduced pests. The overall effect is a more comfortable home and improved quality of life for your family. The energy savings alone can offset the cost of removal and installation.
4. Reduced Home Maintenance
Insulation is one of those things that tends to get neglected over time. It isn’t as obvious as a roof replacement or painting the living room, so it is often placed on a “to-do” list that isn’t always prioritized over other projects that seem more urgent. The good news is that proper insulation installation can actually save you a lot of money over the long run.
As insulation ages it loses its effectiveness, which is why it is important to have it removed and replaced every decade or so. This is also an ideal opportunity to replace old fiberglass batts and cellulose with a modern energy saving insulating solution.
The most common method for removing attic insulation is machine removal. This involves using a 23 horsepower insulation vacuum that is stationed in a safe area outside of your home and a hose that channels the old insulation into the vacuum. This is a fast and efficient process that prevents contamination from entering the rest of your home.
Regardless of the type of attic insulation you have currently, it is important to cover your furniture with drop cloths or plastic tarps to keep it clean during the process. If you have any breathing issues, it’s also a good idea to wear a mask to avoid airborne contaminants.
It’s also important to have a professional inspect the attic for hazardous materials like asbestos or vermiculite that may need special care and handling during the removal and installation process. Professional insulation services typically offer this service as well and will ensure your house is safe for future homeowners to inhabit.
5. Reduced Health Risks
Older insulation often contains harmful substances and can lead to a number of health issues. Mold spores can be circulated throughout your home and cause respiratory distress, while vermiculite, which was popular in older houses, is known to contain amphibole asbestos fibers that can cause lung disease, including mesothelioma (lung cancer). If you live in an older house with old or damaged insulation, replacing it with modern materials can significantly improve indoor air quality and reduce health risks.
If your original insulation has been compromised by water or a hidden leak, it may be infested with mold and mildew that can affect the indoor air quality throughout your house. This can trigger allergic reactions and other breathing issues in sensitive individuals, while also allowing mold spores to penetrate the air conditioner and heating system, leading to further respiratory problems.
Spray foam insulation can also pose a number of health concerns, as it is typically composed of volatile organic compounds (VOCs), such as methylene diphenyl diisocyanate, or MDI, and the toxic flame retardant TCPP. Both of these chemicals can be dangerous for workers handling the material during installation, as well as occupants of homes where it is used.
If you have an older house with old or ineffective insulation, consider the many benefits of upgrading to a more energy efficient and healthier insulation solution from RetroFoam of Michigan. We have helped tens of thousands of homeowners make their homes more comfortable and healthier spaces by updating the insulation. Contact us today to schedule a consultation and get started! Put on protective gear, such as a dust mask, eye protection and gloves. Set up your commercial vacuum or HEPA filtered shop-vac and clear an attic access point in your attic. Use a ladder to reach the attic and begin removing old insulation, disposing of waste bags in the dumpster as you go.
Tips For A Successful Home Improvemnet Project
Home improvement can be very intimidating to someone that has never done it before. It can lead to information overload because of all of the resources available to you. Below are some tips to assist you in getting all of this information organized to where you can start improving your home today.
Removing dated wallpaper is a home improvement that can completely transform the interior of your house. If you have money to spend, the best way to remove wallpaper would be to buy a commercial stream wallpaper stripper. If, however, you are on a limited budget, fill a spray bottle with a mixture of hot water and fabric softener and completely saturate the wallpaper. Leave the wallpaper for a few minutes then carefully peel off with a putty knife.
Instead of purchasing plastic boxes for under bed storage, buy some square baskets. Baskets are a great way to store items you may need throughout the day, while keeping your room uncluttered and neat. Plastic doesn’t look very nice, but using baskets can be a touch of professionalism in any environment.
Displaying books in your living area can be a great sign of intelligence as well as a nice decorating accessory. Make sure when you’re displaying your books to arrange them according to height and color. Not arranging books according to height will make your collection appear messy and unorganized. Arranging your books by color will make your area seem sophisticated.
When it comes to home improvement, be sure to do your background work and ensure that the contractor is bonded. This is important because a way to assure that the job you intended to be completed will be completed per the stated terms. Also, the bond provider will cover any damage or theft that occurs.
Hopefully, these tips have provided you with some very valuable information, as well as given you a way to organize all of the thoughts and information you may have already had on home improvement. Keeping these tips in mind when you start working can help you create the home of your dreams.
You can also visit our other websites and post your article.
Ambrose-Construction, Sustainable Homes In Los Angeles, Chain Link Fence Install , Legends Handyman Service, Canty Plumbing, Fix It Plumbing, Local Tucson Attorney, Middle Class Union Made, My Begin Marketing, SS Concrete Specialist, Steves Remodeling-Gutters, USA Home Repair Remodeling, Woodstock Cabinetry, Air Conditioning Huntington Beach. Asp Plumbing Heating, Fairfield County Septic, Houston Plumbing Done Right, Plumbers Dayton Ohio, The Real San Jose Plumber, Tow Truck Irvine, 4 All Season Marketing, 614 Appliance Repair, Able Demolition And Salvage, Accent Appliance Service, Advanced Concrete Staining, ADV Home Improvement, City Seamless Gutters, Allegiance Lawn Pro, Amazing Drywall Ideas, American-Decks, Atticus Landscaping, Bama Lawn Masters, Bark Tree Care, Best Local Installer, Brayhines Septic, BrentryDer Masonry, Broadway Building Contractors, Brookshires Fireplaces, Cole Graham Drywall, Concrete Jacky, Danalogsdon Roofing El Cajon, Deck Builders Missour City, Deibys Landscape, Downs Plumbers, Dream Home Remodeling Services, EC Siding Roofing Windows, Elite Painting and Dry Wall, Ellis Repairs, Fallisis Hardwood Flooring, Foundation Repair By De Leon
A Guide to Replacement Windows

Many homeowners choose to replace windows with units that look like their originals but are better insulated and easier to maintain. Often, such units are approved by the Landmarks Preservation Commission (LPC) if they match the styling and detailing of existing frames.
Replacement Windows MA can be installed in two ways: pocket or full frame. Pocket installation is less expensive and causes fewer alterations to walls, trims and siding.
Purchasing replacement windows is a major investment. To make sure you’re happy with the results, it’s important to understand what to expect from start to finish. This guide covers everything from the initial browsing phase to installation and beyond, so you can feel confident in your investment.
Before any work is done, a quality contractor will visit your home to help you select the style, color and material of your new windows. They will measure your existing window openings, which helps ensure that the replacement windows are the right size and fit. During this home visit, the FENSA approved installer will also help you determine whether to opt for replacement or new construction windows.
Next, the crew will remove the old windows and prep the area for installation. They will clean the frame and surrounding sealants to remove any dirt, dust or debris that has built up over time. This will ensure the new replacement windows are able to adhere to the existing sealant properly.
They will also score the surrounding trim boards around the window to help separate them from the wall and make it easier to remove them later. This will also reduce any damage to the wall or trim boards during removal. Lastly, the crew will spray foam in the sash weight pockets and sill to provide a tight seal. Then, a pan will be placed at the top and bottom of the window to direct any water out of the opening and prevent it from getting trapped behind the window.
Then, they will begin the actual installation of your replacement windows. They will use shims to fill in any space left between the window and frame to help square it horizontally and vertically. A high-quality installer will use shims sparingly, only where necessary and in places that will be difficult to reach once the window is set.
Once the window is set, the team will install exterior trim or cladding to protect the window from weather and moisture. They will also apply caulk to the inside of the frame and sash. This will create a weatherproof barrier that will keep heat and cold from escaping your home and water from entering.
Materials
When replacing windows, homeowners have several options. They can opt for wood, aluminum, vinyl, or fiberglass frames and sashes. Each material has its pros and cons that are important to consider.
The window frame consists of three parts: the head, jambs, and sill. Together, these form a precise opening in which the window sash fits. The frame also provides support and durability for the glass and sash.
Choosing the right frame material depends on the style of your home and personal preference. For example, wood frames offer a classic look and come in many color options. They are a popular choice among homeowners who want to maintain the architectural integrity of older homes or landmark districts. Wood is also more durable and holds up well in all weather conditions. However, it requires more maintenance than aluminum.
In addition to the materials used to make the frames, some replacement windows feature special insulating materials. These insulating materials help to reduce energy costs and keep the indoor temperature stable throughout the year. One common type of insulation is polyurethane foam, which fills the hollow spaces inside the frame. Other replacement windows are insulated with argon or krypton gas. These gases are denser than air and act as an insulator to reduce heat transfer and block out unwanted noise.
There are three main types of replacement windows: sash kits, insert replacements, and full-frame units. Sash kits, like the ones Tom found in his Newton house, provide new sashes and jamb liners in an existing frame. They attach the new liners to the old side jambs, and then slip the new sashes in between. Insert replacements are similar but have the added benefit of being a pre-assembled unit that can be slipped into an existing opening. Full-frame units are the most complicated to install, but they are often recommended for older buildings or structures that require more detailed framing.
For the best results, when installing replacement windows, it is important to follow proper installation guidelines. This helps to ensure the windows fit correctly and operate properly, and that they are secured to the studs in the wall. In addition, it is important to choose the correct hardware and caulking. This will ensure that the window is watertight and secure, protecting against moisture, pests, and harmful UV rays.
Installation
A high-quality contractor should take care not to damage your home’s walls and trim during the window replacement process. They should also protect furniture and wall decorations that can’t be moved to another part of your home for the duration of the project. They’ll cover these areas with tarps to minimize debris and possible damage. In addition to this, a quality installer will continuously sweep and clean the area around your new windows as they’re installing them.
When removing an existing window, your contractors should start by removing the sash and sill, if they are still attached to the frame. They’ll then remove the old sealant and scrape away any rotting wood along the frame. They’ll also inspect the frames for signs of rot or water damage, particularly in the sill and lower sections of the exterior trim. They may be able to repair these sections with epoxy or wood filler, but if the damage is severe, it’s better to replace these parts to avoid future problems.
Installers should also clear out any remaining window hardware and remove the storm windows if you have them. They’ll then vacuum and sweep the area around the window to remove any remaining dust or dirt, and apply an elastomeric caulking in the raw opening to help prevent water leaks. They’ll also apply two continuous beads of caulk around the exterior casings and blind stops on the inside of the frame.
If they’re replacing an insert window, your contractors will measure the existing window openings to ensure that your new window is the correct size. They’ll also make sure the window is plumb (level) by adding shims (scraps of wood about 1/8 to 1/4 in (0.32 to 0.64 cm) thick) under the bottom of the window to prop it up on one side. If you have a bubble level, place it against the outside of the frame and check that the window is plumb. Then, if the window isn’t plumb, you can add additional shims until it is.
Finally, your installer will stuff insulation in the spaces between the new window and the frame to improve energy efficiency. They’ll also screw the sash into its new jambs and install the new parting stop on the top of the frame.
Final Inspection
As with any home improvement project, it’s a good idea to perform a final inspection. This will help ensure that the job is completed correctly and the new replacement windows are performing as intended. The inspection should start with a visual examination of the windows, looking for cracks or holes in the glass, the window frame or the trim around the window. In addition, the seals should be evaluated. If they are cracked or showing signs of water damage they should be replaced.
The sash should also be checked. If it moves freely and without a lot of effort, it is probably in good condition. However, if it sticks, or it is difficult to move the window up and down, the seals may have failed and air and moisture are infiltrating the home. It is also important to examine the frame for moisture, rotting or insect infestation. If these issues are identified, they should be addressed as soon as possible to avoid further damage to the frame and to the home.
Another important consideration is to determine whether the replacement windows meet code requirements for fall safety, egress in an emergency and wind storm loading requirements. If the window design and installation do not comply with these standards, it could result in leaks and structural damage to the building. This is particularly important in coastal areas.
In addition, the window contractor should be questioned about any warranty coverage that may exist. Some manufacturers offer warranties covering parts and labor for a limited time after the window is installed. This type of warranty should be carefully reviewed to understand the details and limitations. It is also a good idea to review the building code requirements for pull permits, sidewalk sheds and environmental testing before starting any work on the exterior of your building. Taking these steps will help ensure that your replacement windows are installed properly and provide the energy efficiency and comfort that they were designed to deliver.
Home Improvement Tips From Experts
If you’re looking for easy home organization ideas and simple house repair tips, there is no better place to start than This Old House. They have been around for decades and know exactly how to simplify complicated projects for the average homeowner.
Before hiring contractors, ask for references from previous clients. Verify that they were satisfied with their work and professionalism.
Make Sure You Have a Vision
Home improvement projects can be an exciting way to refresh your space. Whether it’s cooking dinner in a renovated kitchen or working from a new home office, the end result can be rewarding. However, long before a hammer hits a nail, there are many important considerations homeowners must make to ensure their project is successful. These include:
Having a clear vision for the finished product can be one of the best ways to avoid missteps during your renovation. It will help you stay on budget, keep your crew on task and avoid any pitfalls that may arise during the process.
It is also important to determine your motivation for the project. For example, is your goal to add value to the home, or are you simply updating a room to fit your lifestyle? This can impact everything from timelines to the contractors you choose to perform the work.
Finally, it is important to understand the return on investment of your project before making any decisions about how to move forward. You can do this by calculating the cost of the project and comparing it to the savings you will see once it is completed. This will help you weigh the benefits of your project against the costs, and will give you a better idea of which improvements will be most worthwhile for your family.
Home renovations are expensive, and they require a lot of time and attention. As a result, they can cause a lot of disruption in your daily life. It is important to have a plan for how you will cope with this, so that the project does not interfere with your normal routines too much. This may mean staying in a hotel for a few days during a kitchen renovation, or spending extra time cooking meals to avoid the noise of the construction site.
It is also important to consider the weather. If you are doing a major renovation, be sure to check the weather forecast before starting any outdoor work. This will help you avoid any surprises and save time by scheduling the most suitable work conditions for the weather.
Get a Budget
When it comes to home improvement projects, one of the biggest mistakes homeowners can make is not creating a budget. Without a clear understanding of how much the project is going to cost, it is easy for expenses to add up and quickly go over-budget. This is why it is so important to sit down and create a budget before beginning any renovation work. The best way to do this is to research the types of home improvements you want to make and then price out the materials, labor, and any other costs that may be associated with them.
It is also a good idea to get estimates from contractors before starting any work. This is a great way to get a realistic idea of how much the project will cost and it will help you to determine whether or not you need to cut corners in order to stay within budget.
Once you have a good idea of the cost of your project, it is time to start saving. It is recommended that you save a percentage of your project costs each month for a minimum of 12 months. This will ensure that you have the funds available to complete your project no matter what happens.
Another great way to save money on a home improvement project is to shop around. You will be surprised at how much you can save just by taking the time to compare prices. It is also a good idea to choose quality over quantity when it comes to home improvement items. It is better to spend a little bit more on a few high-quality items than it is to buy a lot of low-quality items that will end up breaking or not lasting as long as you would like.
Finally, if you are not able to save the money for your home improvement project on your own, it is a good idea to look into financing options. This can be a great way to get the funds you need without having to put up any collateral or use your home equity.
Hire the Right Contractor
When it comes to a home improvement project, you may be faced with the decision whether or not to hire a professional contractor. There’s nothing wrong with doing it yourself, but sometimes certain projects are better left to the professionals. They can bring a level of expertise that is hard to match and make sure the job is done properly. This makes it worth hiring a pro for a project like a kitchen remodel, which requires specialized plumbing and electrical work.
If you do decide to hire a professional, do your research. You’ll want to find out if the contractor is licensed and insured, which means you should ask for their company name and address, license number, and proof of liability and worker’s compensation coverage. It’s also a good idea to check with your local consumer protection agency or the Better Business Bureau for any complaints against the contractor.
Once you’ve narrowed down your options, call each contractor to get a feel for their professionalism. How they answer the phone and their general demeanor should give you a clue as to how they will perform on the job site. In most cases, it’s best to meet with contractors face-to-face before making a final decision. This will allow you to see if there is any “chemistry” and if they can communicate effectively.
During this meeting, ask the contractor for an itemized quote that will break down the cost of materials, labor, and profit margins. This is also an excellent time to ask the contractor for references and to visit past projects they have worked on. Make sure the contractor has the proper credentials to complete your job and is willing to provide you with a written contract. It’s also a good idea not to make any payments in cash; always use a credit card so that you have a layer of legal protection should anything go wrong with the work. Lastly, don’t be afraid to negotiate pricing. A quality contractor should be able to accommodate your budget, but be wary of anyone who is unwilling to do so.
Do Your Research
Adding things to your home may be exciting, but you need to make sure that whatever you are doing is something you really want and that it will add value. The last thing you want to do is spend a lot of money on a home improvement project that will not add to the overall value of your house.
This is why it is so important to do your research before hiring someone for a job. There are plenty of resources online that will give you information about the contractor’s background and experience so that you can make sure that they are legitimate. Often, you can even schedule a consultation with them before making the decision to hire them for the project. This will help ensure that you get the best results and that you are comfortable working with them.
Homeowner’s never stop working on their houses, whether it is fixing something that is broken or just giving it a general sprucing up. The good news is that, with a little planning and expert advice, any home improvement project can be fun and easy!